PFLEGEHINWEISE
Bist du dir nicht sicher, ob deine Pflanze umgetopft werden muss? Hier sind 4 Anzeichen, die dir das verraten:
Sie ist wackelig, blass und hat aufgehört zu wachsen
Die Wurzeln haben begonnen, aus den Drainagelöchern im Boden herauszuwachsen
Sie ist kopflastig und fällt leicht um
Das Wasser läuft beim Gießen direkt durch den Topf - ohne dass die Erde wirklich nass wird
DREI OPTIONEN, DIE DU BEIM UMTOPFEN BERÜCKSICHTIGEN SOLLTEST
EINEN GRÖSSEREN TOPF VERWENDEN Gut für Pflanzen, die viel wachsen und bei denen der aktuelle Topf begonnen hat, ihr Wachstum zu hemmen.
GLEICHER TOPF, NEUE ERDE Für Pflanzen, die nicht noch größer werden sollen.
DIE OBERSTE SCHICHT DES BODENS WECHSELN Für große Pflanzen, die zu schwer zum Umtopfen sind. Entferne die oberste Schicht der alten Erde und füge eine neue, frische hinzu.
DIE TOPFGRÖSSE IST ENTSCHEIDEND
Wenn du einen neuen Topf aussuchst, denke daran, einen zu verwenden, der nur etwas größer ist als der letzte. Eine gute Faustregel ist, dass er etwa 1" bis 2" größer sein sollte. Wenn du einen zu großen Topf wählst, besteht die Gefahr, dass die neue Erde zwischen den Wassergaben nicht schnell genug abtrocknet, was dazu führen kann, dass deine Pflanze in der nassen Erde erstickt.
EMPFOHLENE ERDE
Setze die Pflanze in einen 1"-2" größeren Topf um.
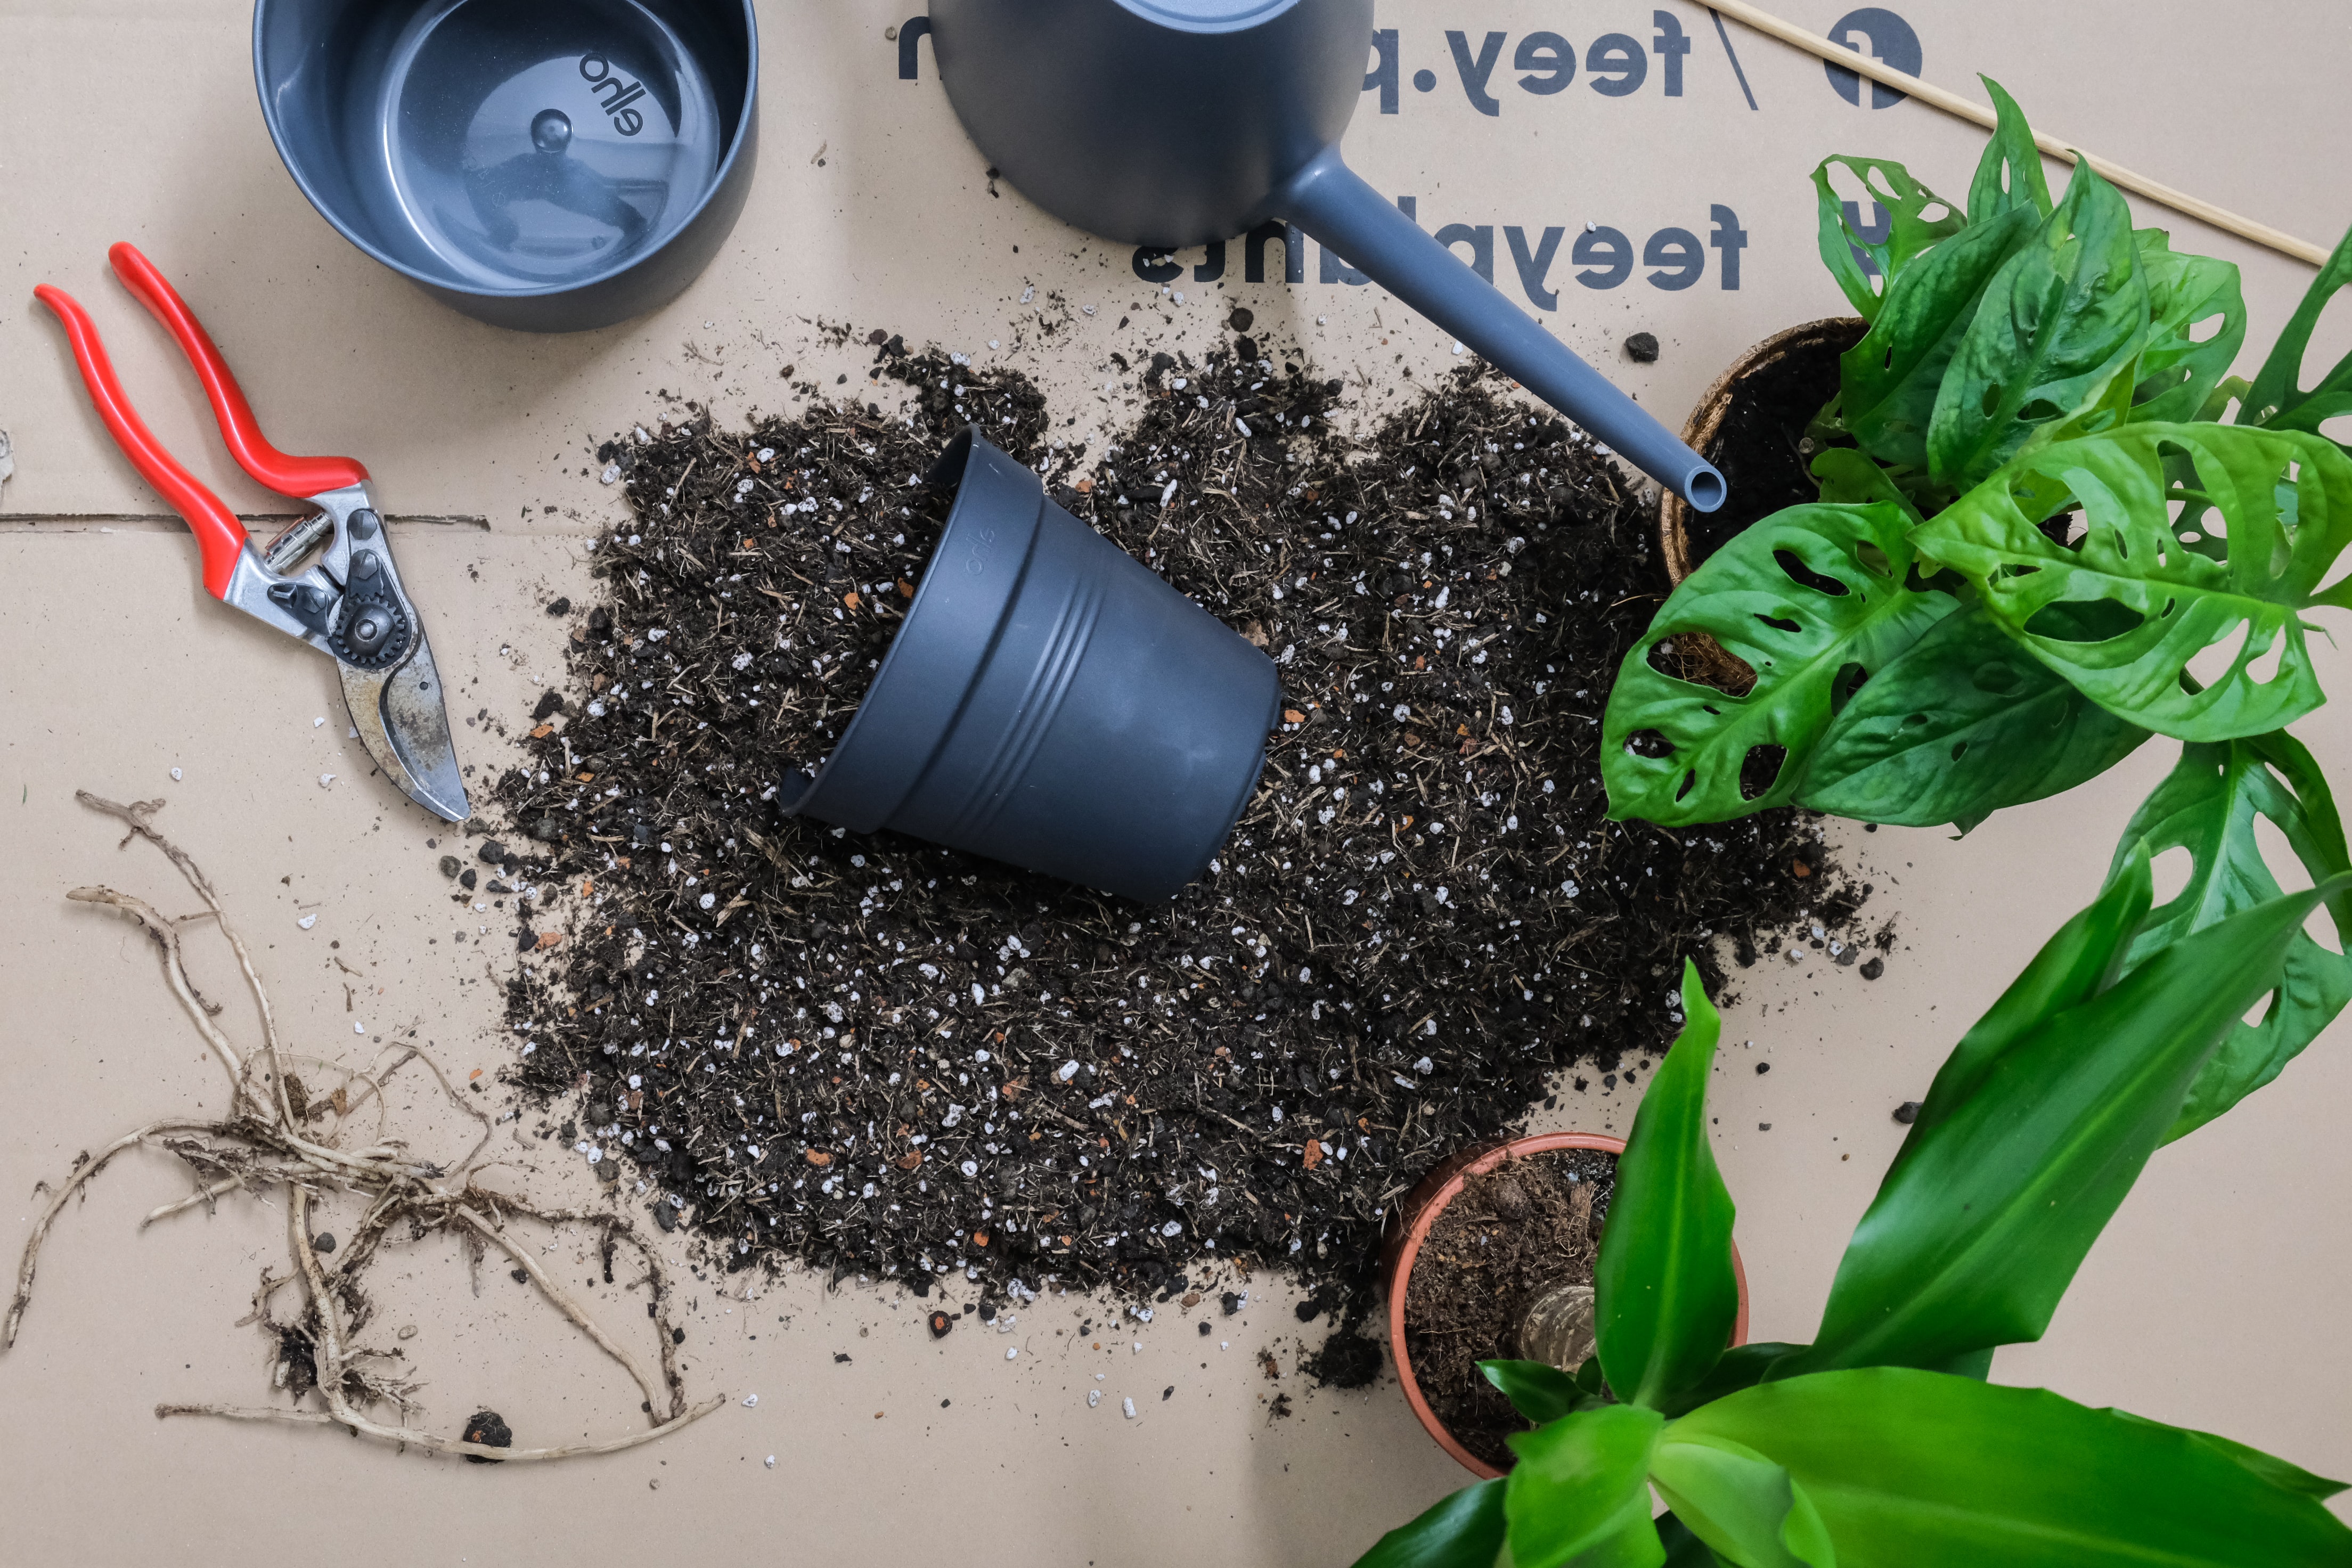
SO TOPFST DU DEINE PFLANZE UM
Gieße deine Pflanze Gieße deine Pflanze, um die Erde aus dem Topf aufzulockern.
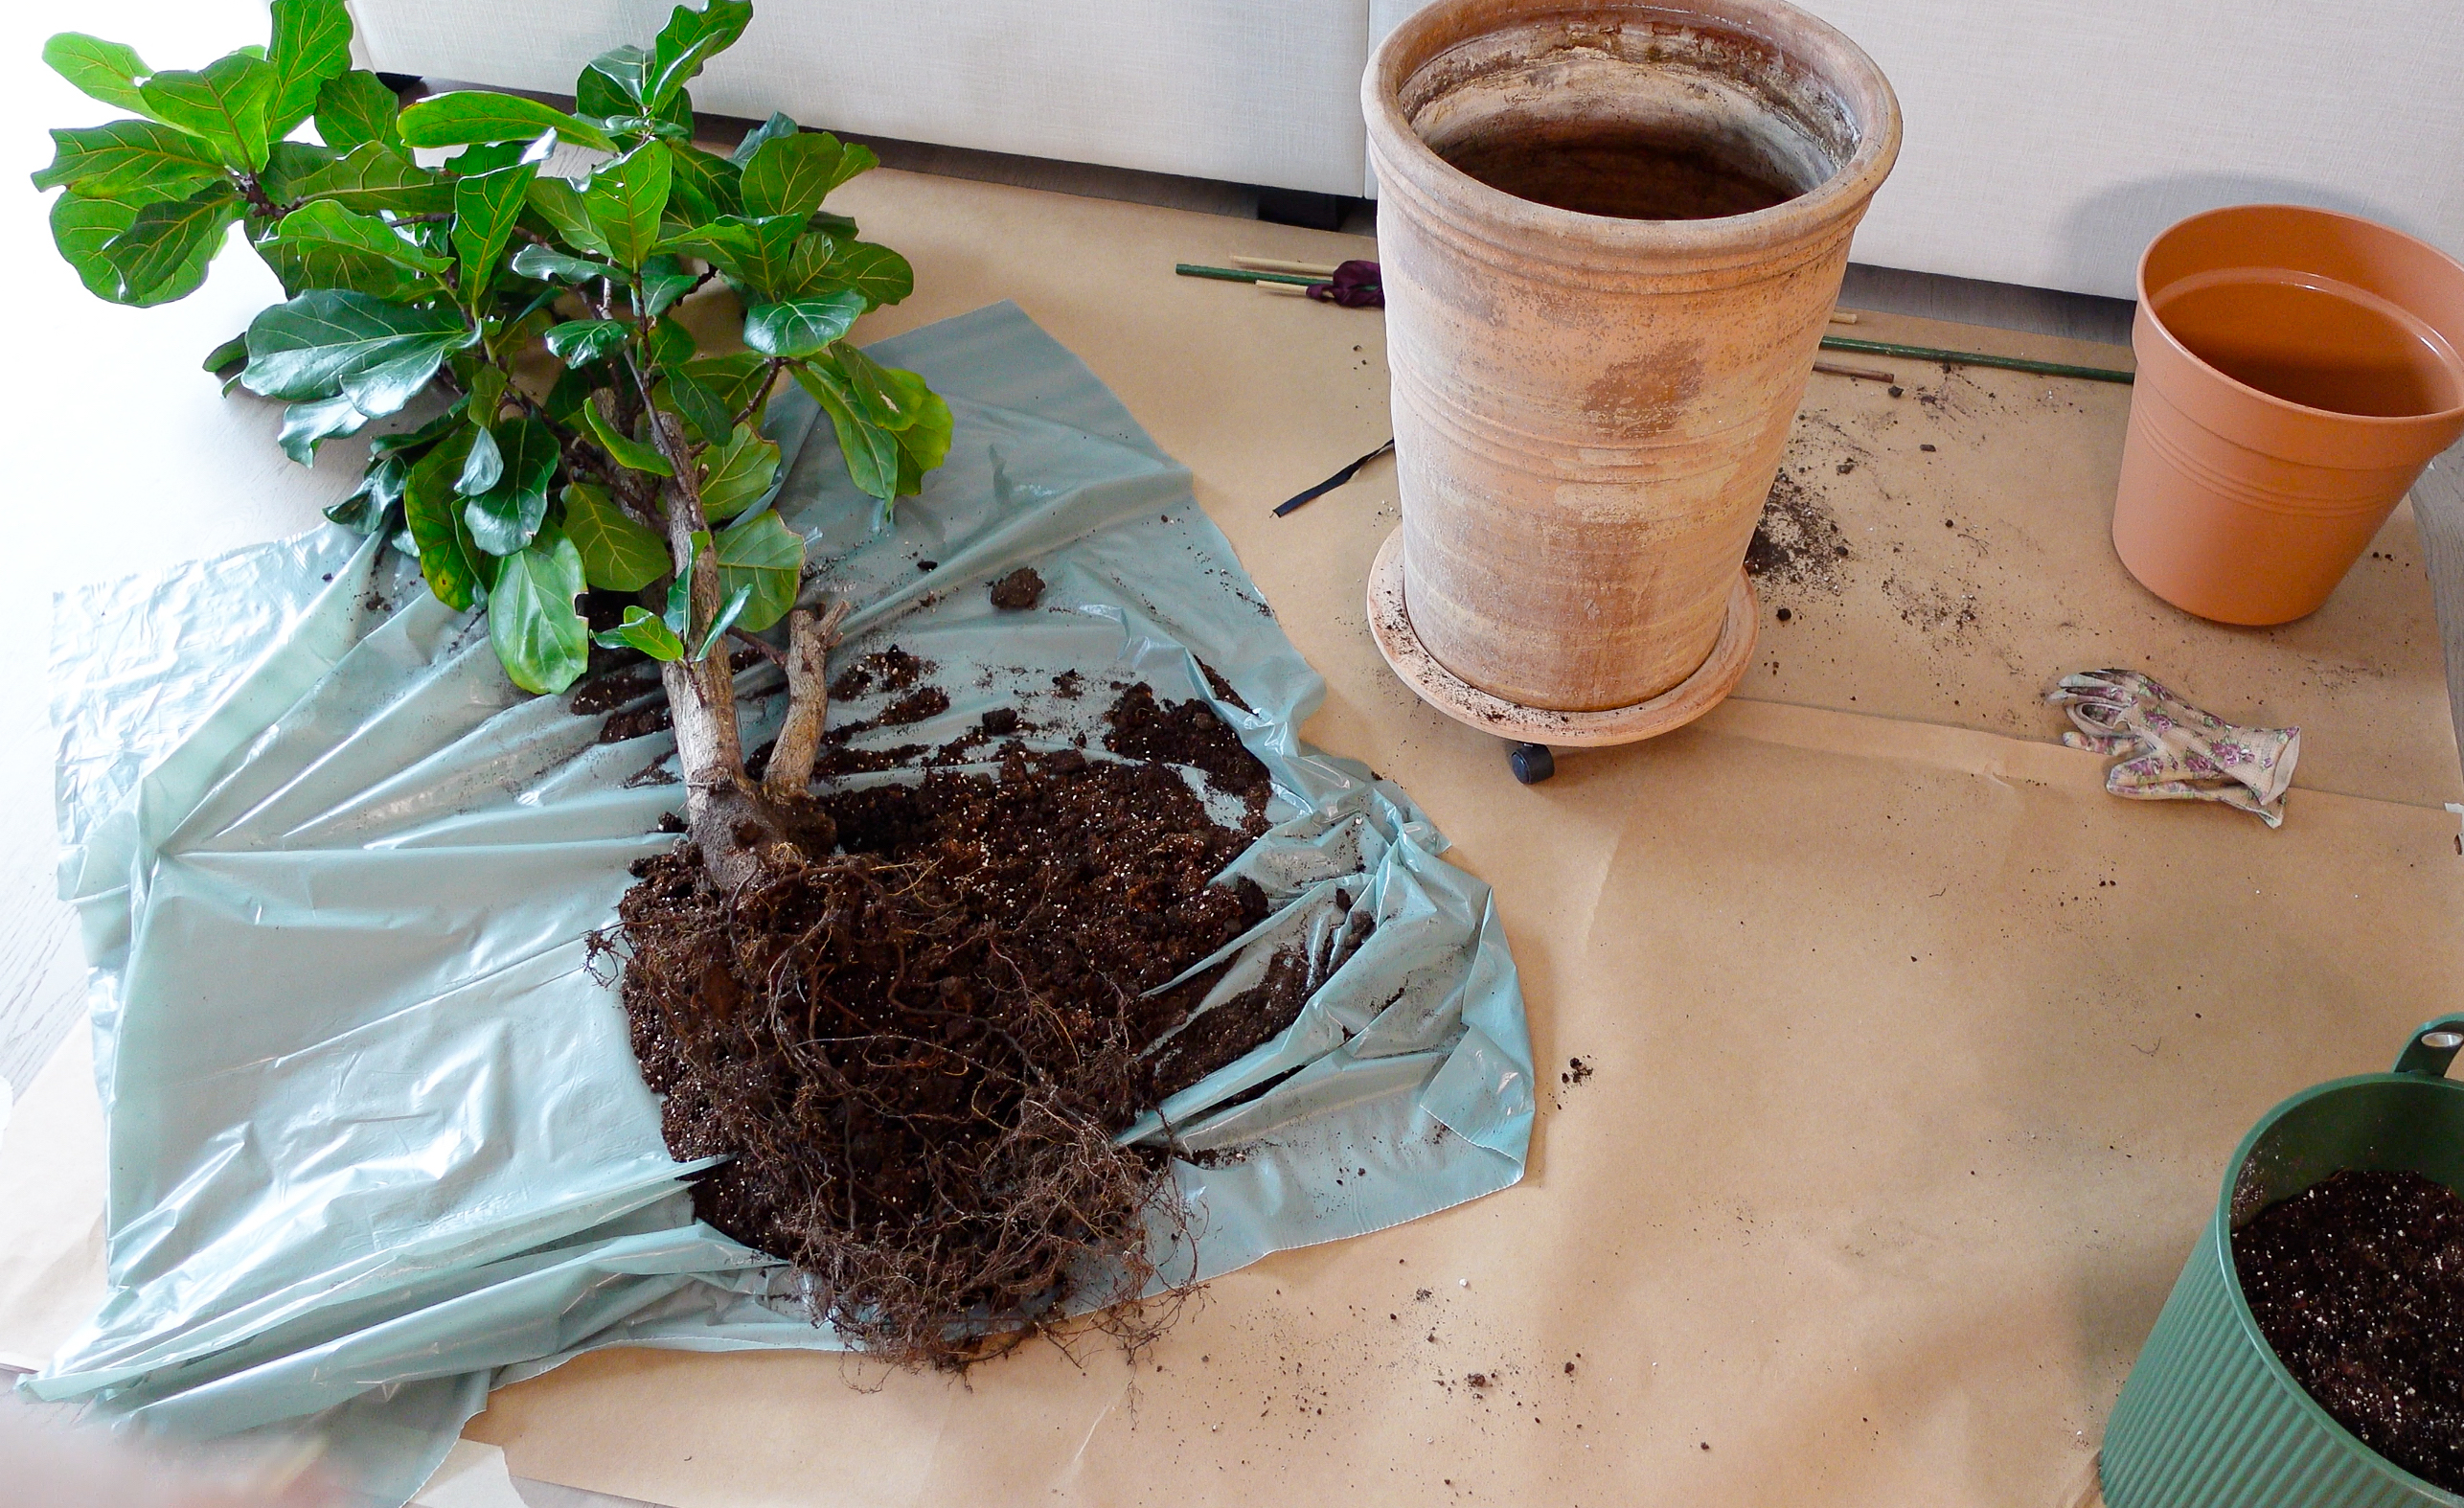
Entferne den Topf Fasse die Pflanze vorsichtig an und beginne, den Topf zu lockern, ohne dabei am Stamm oder an den Ästen zu ziehen. Wenn sich der Topf nur schwer ablösen lässt, versuche, die Erde mit einem kleinen Messer von den Rändern des Topfes abzuschneiden. Du kannst auch vorsichtig mit einem Werkzeug auf die Außenseite des Topfes klopfen.
Beschneide die Wurzeln Führe eine Wurzelkontrolle durch und entferne alles, was tot, schimmelig oder faul aussieht. Wenn sowohl die Erde als auch die Wurzeln gesund aussehen, vermeide es, den Wurzelballen zu berühren, da dies Stress für die Pflanze bedeutet. Wenn es dicke Wurzeln gibt, die sich aufgewickelt haben, lockern Sie diese mit Ihren Fingern oder schneide sie ab. Wenn du den gleichen Topf wieder verwendest, schüttle die Erde von der Pflanze ab und schneide etwa 25 % der Wurzeln weg. Dies wird der Pflanze helfen, frisch und klein genug zu bleiben, um weiterhin im selben Topf zu leben.
Reinige den Topf Stelle sicher, dass der neue Topf sauber von alter Erde ist. Wasche ihn mit Seife, spüle ihn gut ab und tupfe ihn trocken. Wenn du beim Umtopfen deiner Pflanze einen schmutzigen Behälter verwendest, besteht die Gefahr, dass in der alten Erde Mikroorganismen leben, die deine Pflanze infizieren können.
Topfboden mit Erde befüllen Fülle Erde in den Boden des Topfes. Achte darauf, dass du die richtige Menge einfüllst - der Wurzelballen sollte ein paar Zentimeter unter dem Rand des Topfes platziert werden - wenn du ihn zu hoch platzierst, läuft der Topf beim Gießen über.
Einsetzen der Pflanze Setze die Pflanze auf die Erde und prüfe, ob sie mittig steht, bevor du weitere Erde hinzufügst.
Einfüllen der Erde Fülle die Erde um die Pflanze herum auf: Klopfe sie vorsichtig mit den Fingern an, damit sie fest wird, und überprüfe, dass die Pflanze nicht tiefer eingepflanzt wird als vorher.
Gießen Gieße die Pflanze, bis das Wasser durch die Drainagelöcher austritt.
Mehr Erde? Manchmal müsst du nach dem Gießen der Pflanze mehr Erde hinzufügen. Vergewissere dich, dass deine Pflanze genügend Erde um ihre Wurzeln hat.
NACH DEM UMTOPFEN
Umtopfen ist für Pflanzen stressig. Es dauert etwa einen Monat, bis sich Ihre Pflanze vollständig erholt hat und die neue, verbesserte Umgebung genießen kann.
Achte während dieser Zeit auf Folgendes:
Stelle die Pflanze an einen hellen, aber geschützten Platz. Vermeide direkte Sonneneinstrahlung.
Gieße sie. Befolge die Anweisungen in Planta, um sie richtig zu pflegen.
Nicht düngen. Die neue Erde ist mit Pflanzennahrung angereichert, weiteres Hinzufügen kann den bereits gestressten Wurzeln schaden.
Three options when considering repotting
Use a bigger pot
Good for plants that grow a lot and where the current pot has started to inhibit its growth.
Same pot, new soil
For plants that you don’t want to get any bigger.
Change the top layer of soil
For big plants that are too hard to repot. Remove the top layer of the old soil and add a new fresh one.
Recommended soil
This is how you repot your plant
Water the plant Water your plant to loosen up the soil from the pot.
Remove the pot Gently take hold of the plant and start to loosen the pot, avoiding pulling on the trunk or branches. If it’s hard to get the pot to come off, try to cut the soil loose from the edges of the pot with a small knife. You can also gently tap on the outside of the pot with a tool or on the bench.
Prune the roots Do a root control and remove anything that looks dead, moldy or rotten. If both the soil and the roots look healthy, avoid touching the root ball, as it causes stress to the plant. If there are thick roots that are coiled up, loosen these with your fingers or cut them off.
If you’re using the same pot again, shake the soil off from the plant and cut away about 25% of the roots. This will help the plant stay fresh and small enough to continue living in the same pot.
Choose the pot When picking out a new pot, think about using one that’s only slightly bigger than the last one. About 1”-2” larger is a good rule of thumb. If you pick a pot that's too large, there's a risk that the new soil won’t be able to dry up quickly enough between waterings, which might cause your plant to suffocate in the wet soil.
Clean the pot Make sure the new pot is clean from old soil. Wash it with soap, rinse well and pat dry. If you use a dirty container when repotting your plant, there’s a risk that microorganisms are alive in the old soil, which can infect your plant.
Pour soil in the bottom of the pot Add soil to the bottom of the pot. Make sure that you put down the right amount - the root ball should be placed a few inches under the edge of the pot - if you place it too high your pot will overflow when watering.
Put down the plant Place the plant on the soil and check that it’s centered before you start adding more soil.
Add soil Add soil around the plant: gently tap it with your fingers to make it firm and check that your plant is not planted deeper than it was before.
Water Water the plant until water starts to exit through the drainage holes. If your plant was watered close to the repotting you might skip this step and just stick to the schedule instead.
More soil? Sometimes you need to add more soil after watering the plant. Make sure that your plant has enough soil around its roots before you are done.

After repotting
Repotting is stressful for plants. It takes about one month before your plant is fully recovered and can start to enjoy the new and improved environment.
During this period make sure to
Place the plant in a bright, but sheltered place.
Water it but stick to the schedule if possible. Follow the instructions in Planta to get it right.
Don’t feed it. The new soil is filled with plant food, adding more can harm the already stressed out roots.